

How to photograph lightening
Lightening photographs 101, How to photograph lightening
How to take photographs of Lightening.
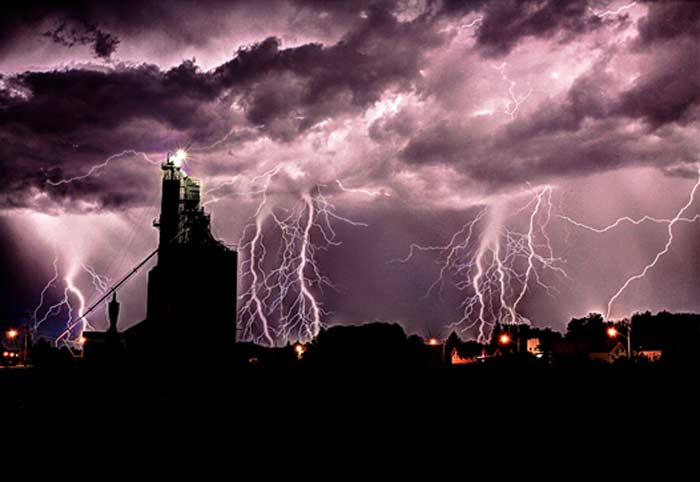
Since publishing my photograph of lightening over a grain Elevator many people have asked me ” How did you do that”? It is easy when you know how and I will share the secrets here and now.
Lightening photographs 101
The photograph you see was taken in a particularly fierce thunder storm with lightening flashes every few seconds which is a bonus for photographs, and just before the heavy rain at 3am on a July morning.
Where ever I go I always scout out good positions for a photographs depending on the light time of day and for composition. This location had been in my mind for several years and then July 4th it was the right place for lightening photography.
Always have a good composition that would be interesting without lightening, do not get so involved capturing the lightening you forget composition, nothing worse than a sloping horizon.
Lightening can be an elusive foe, it seems many struggle to get a good result, read my tips step by step and you will be a pro at lightening photograph in no time.
Taking photographs of lightening is much like using a flash gun with your camera, meter for the flash not the ambient light, subjects in the photograph will be lit or silhouetted by natures flashes. It is a fine balance fork lightening is great to capture but if there is sheet lightening the photograph will be over exposed.

Lightening photographs 101, How to photograph lightening
Sheet lightening will illuminate the foreground like a flash gun
How did I do it?
Rule #1
Be safe. Do not stand in the middle of a field next to a tree or a lightening conductor, and not advisable to be next to a metal tripod, once set up use a remote shutter release from a distance.. I set up my camera and sat 30 feet away in the Van using the remote control. Check your local weather network. Lightening and heavy hail are dangerous, if in doubt don’t go out.
Rule #2
Tools for the job.
- Camera a DSLR is preferable.
- Tripod a must for stability
- A remote shutter control
Rule #3
Find your position set up the tripod and camera with the focus on manual, for infinity pull the focus slightly back from the full extent of the focus ring, better still find a distant light and focus manually and take a few test shots to see all is sharp.
Rule #4
Set the ISO to 100 or 200 if the lightening is in the distance use a wide angle lens with an aperture of F5.6 and the speed setting to “B” allowing the shutter to remain open as long as you deem fit. I prefer to turn off the white balance, this adds to better and truer colour definition. Always set the camera to take RAW photos this will help if editing is needed later, jpeg photos will lack true colour density.
Rule #5
Now you are set bring on the lightening preferably an exposure of between 20 and 45 seconds is ample depending upon the number of flashes that come within that time. I try to have at least four lightning bolts before closing the shutter, or go to a maximum of 45 seconds exposure.
Rule #6
Not every shot will be perfect but when you do get the right shot it is well worth the effort. Let me know how you get on, most of all enjoy and be safe.
Copyright David Matthews 2015

Lightening photographs 101, How to photograph lightening
Pingback: zyloprim anxiety medication
Pingback: sertralin
Pingback: augmentin for pneumonia
Pingback: diflucan for yeast infection over the counter